Popular This Week
Find It Fast
- 2-1-1 Wisconsin Disaster Report
- Bid / Contract Opportunities
- Office of Emergency Management
- Birth and Death Certificates
- City of Milwaukee Budgets
- City Charter and Code of Ordinances
- City Real Estate
- Download City Data
- Employment Opportunities
- Fraud, Waste and Abuse of City Resources
- Garbage and Recycling Schedules
- Homeownership Opportunities
- Housing Resources
- Legislative Research Center
- Licenses or Permits
- Map Milwaukee Portal
- Milwaukee's Open Checkbook
- Parking & Parking Permits
- Property Data
- Sales and Use Tax
- Street Closures & Traffic Restrictions
- Televised City Meetings
- Where Do I Vote / What's On My Ballot?
Springtime Guide
This spring, find helpful tips on getting involved with neighborhood cleanups, improving your home, creating gardens and green spaces, being active outdoors, and staying prepared for fire and storm hazards. Take advantage of community resources and grant incentives to improve your community.

City of Milwaukee News

Milwaukee’s Juneteenth Celebration
This significant day is honored with a variety of events and activities that reflect the rich culture and heritage of the African American community. On June 19, Milwaukee’s Juneteenth Celebration tradition continues on Dr. MLK Jr. Drive from 9 a.m. to 4 p.m. Join us at 9 a.m. for the 55th Annual Milwaukee Juneteenth Jubilee Parade, an unforgettable celebration featuring vibrant floats, marching bands, dance teams, and exciting activities.
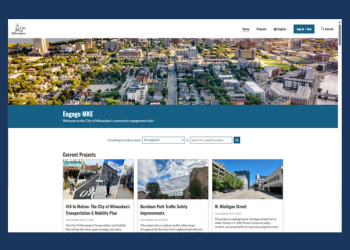
Engage MKE
Have your say on the future of Milwaukee. Engage MKE is the City's community engagement hub, where you can follow active projects, weigh in on plans shaping our streets and neighborhoods, and stay up to date on the decisions that affect your community.

Hello Summer - Fun for Youth
Explore our Hello Summer website for internships, jobs, events, youth programming, summer child care, summer camps, and more!
Find plenty of youth activities and free events to keep busy and have fun all summer long.

Federal Immigration Operations in the City of Milwaukee
This Frequently Asked Questions (FAQ) list compiles short answers to some of our most frequently received question relating to how immigration operations work within the City of Milwaukee.

Yearof Housing
Visit our Year of Housing webpage to find housing-related resources, data to track City progress in its housing goals, and discover what City government is doing to address the housing crisis. This page was created in response to the ongoing affordability crisis that our nation faces.
Meeting & Events Calendar
Click or Call for Action
From potholes, abandoned vehicles, high weeds on vacant lots, and curbside trash to faulty traffic signals, the City of Milwaukee's Unified Call Center (UCC) makes it easy to submit service requests to solve problems.